The Grinding Job
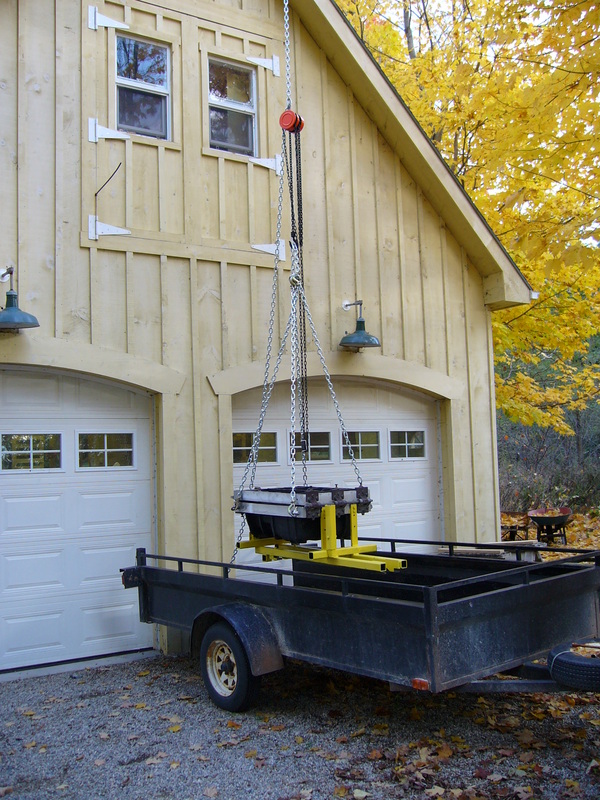
Back in the fall of 2005, I got a call from an old family friend who had built a small empire in a segment of the auto sector. His company was responsible for making the aluminum molds for the foam seats for many North American car companies. It's a very technically driven field that has computers doing incredible calculations to design the necessary components and in turn, more computers to figure out how to make the tools to make these parts. It's a huge web of interconnected processes, parts and companies too. The thing is though, computers can only go so far and eventually you need a human to do the final fitting sometimes. This is why I got the call. At the time, this hand work was causing a major bottleneck in their process, and they needed to sub out this work immediately since they had deadlines coming up and they had run out of space in their industrial unit for grinding bays. As the conversation started, I was very curious about how a guy like me could be asked to jump into a field without any direct knowledge of what was required. Brian explained that they needed guys with a "McGyver skill set" to work on their own and figure out what each mold needed based on certain guidelines. His description of the work sounded well within my capabilities, so I said: "I'm listening...". Then he mentioned that they need a satellite operation to be able to take 4-6 of these a week, meaning 4-6 guys per week, one mold per man, averaging 25-35 hours per mold. Then he mentioned how much they pay... "Go on...(!)" I said. He said that the work would come in waves lasting 3-4 months in the spring, once a year usually. So, in my head I did the quick math and realized that if I trained 5 guys to come into my shop and help me, I'd make enough so that I would be able to make furniture in the "off season" on complete speculation. Hey, I could handle that. Basically, If I wanted, I would be able to make furniture sculptures with no worry of them having to sell. ...You want me to do what? So, I agreed to take a 3 week intense crash course to get me up to the level of the guys who had been doing this their whole lives. The guy that taught me had been doing it for 27 years and spoke little English; it was a little stressful, but I was focused and toughed it out. The plan after "graduation" was for me to get one mold a week for a while until everyone involved was comfortable with me picking up and dropping off these hunks of metal. Here's a few snaps of the first mold I did by myself in my shop: 1) The inside of the solid cast aluminum clam shell-style mold, just after I had finished the grinding / polishing phase. Wax strips are applied to control the squeeze out of epoxy. 2) After the epoxy has hardened, a perfect seal is created, but it still needs much trimming, grinding, sanding and finicky fitting. 3) All the trimming is done, bronze fittings have been installed, paint is applied to this side before it is closed to verify a perfect fit. (An even distribution of paint to the other side means that the seal is even.) 4) Perfect fit! My week is done and it's only Thursday, sweet! 5) Ship it! The beam overhanging the front of my shop has a chain-fall style winch for lifting heavy stuff in and out of my trailer. I knew that beam would come in handy. One down, bring it on!.... Then... Hello?.... hello?.... hello?? Yes, 2005 was when the auto sector actually started feeling some signs of slowing and downsizing, and so, that was my first and last mold. Back to making furniture full time with an added set of skills under my belt, which I would end up using later; stay tuned.
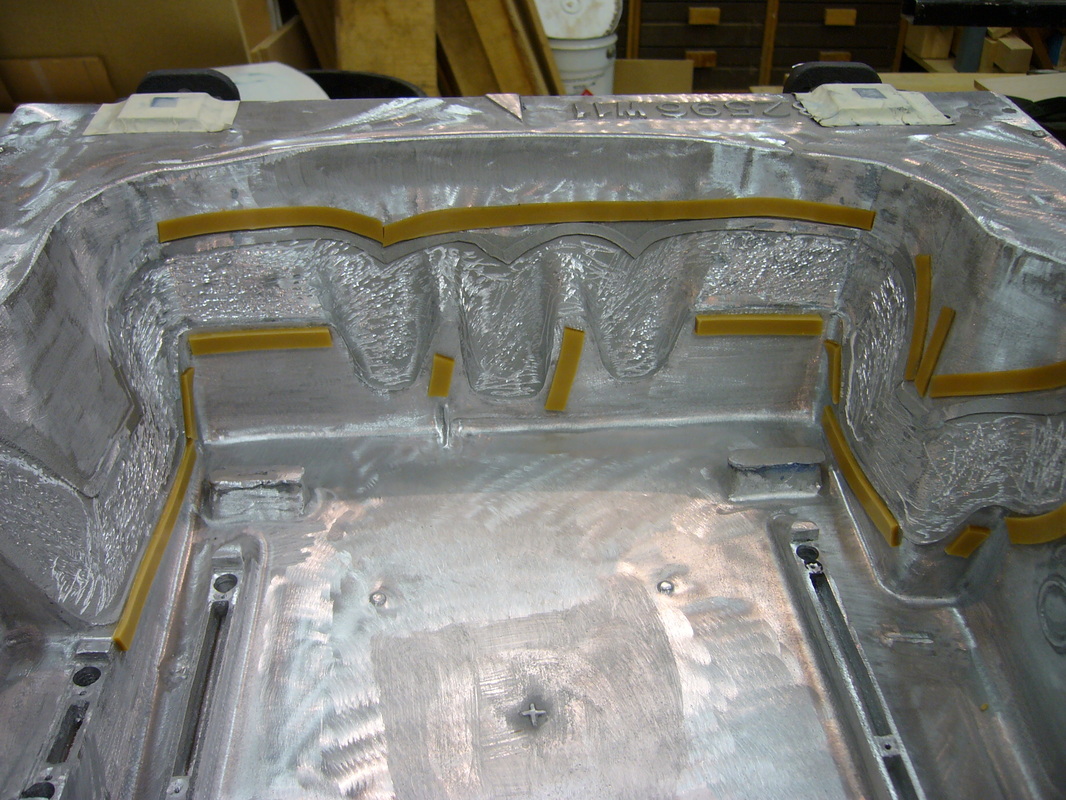
The mold raw, with some wax tape to dam the epoxy.
|
|
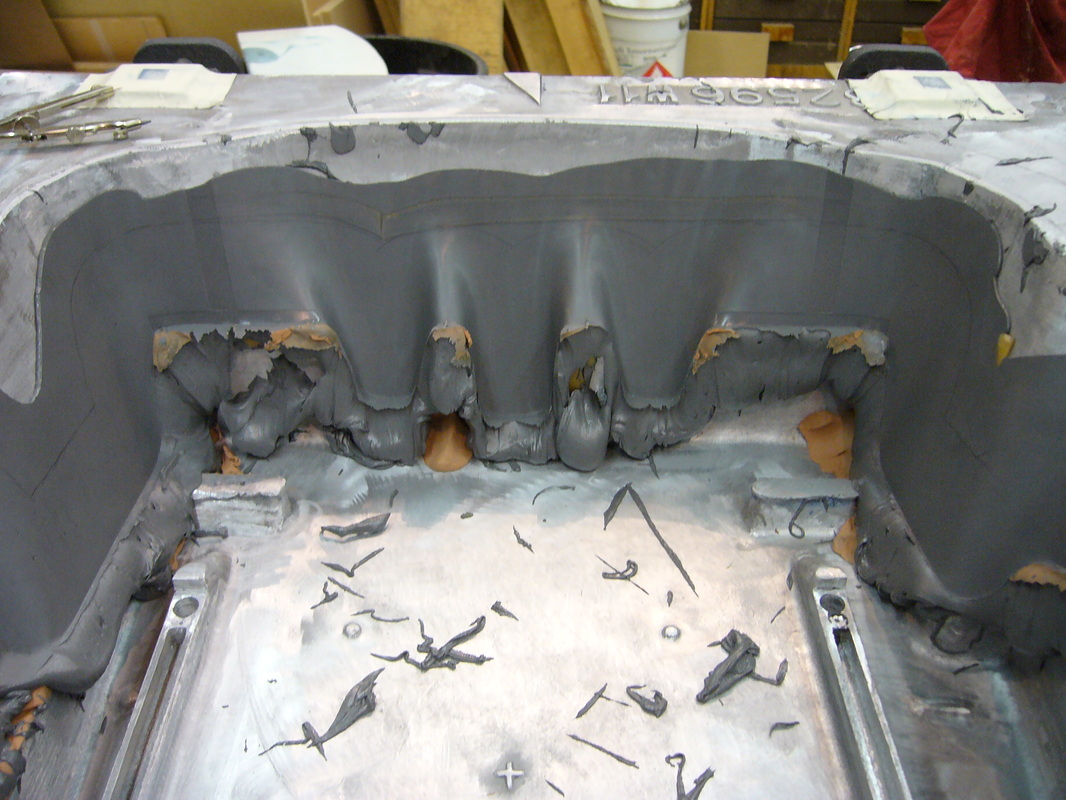
Epoxy has squeezed out, hardened, now needs to be ground off accurately to form a seal.

Done, blue paint applied to test seal with other side of the clam shell.
|
