

The model
|
From model to completion
|

|
|
|
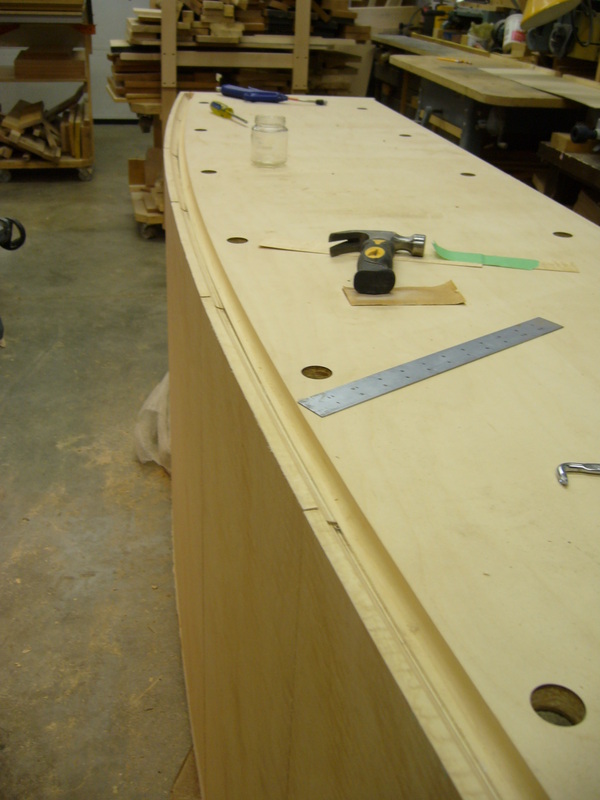
The curve on each individual door was barely evident, but together they formed a long graceful bow.
|

Selecting the veneer. It had buckled while in storage, needed to be soaked and flattened.
|

Vacuum forming the doors
|
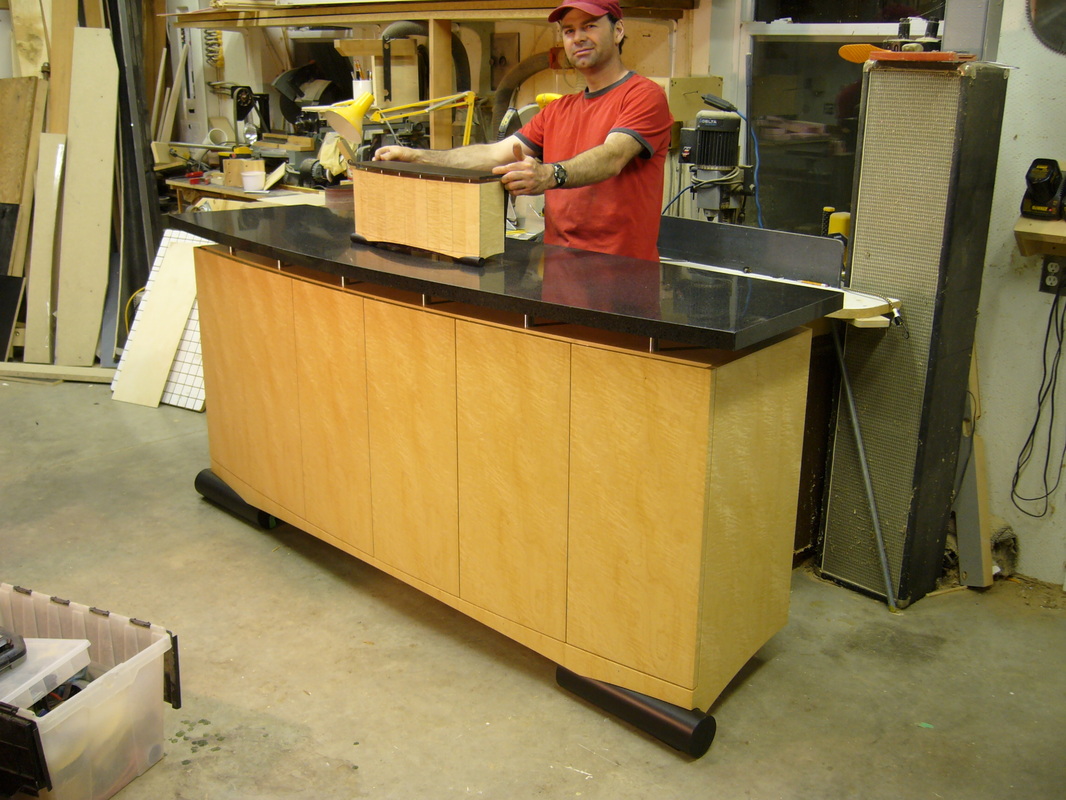
Crebola! The name came from "Credenza for Bob & Lola". (If you thought part of it came from incredible, I'm fine with that.)
This one's really special.
It had been a little while since someone had put me in a position to come up with a larger unique and original piece in my own style. I was basically told that they wanted something to put their dishes and bar in and "there's the wall where it'll go". Bob is amazing in inspiring people to do their best; he had pulled it out of people many times back in the day when he was a movie producer among other things, and so when he saw my abilities and gave me an idea of which of my pieces he liked ("Liquor Cabinet 2"), he easily set me on course.
I spent a week getting not much done other than brain storming, sketching, resketching and intensive model making. My office space is upstairs in my studio, adjacent to my concise music area. During the creative process of designing this piece, I would stare at pages of doodles and scribbles for a while at my desk, then walk over to my music pit to bash away on a guitar or go for a run on my drum kit for a break. By the time I was relieved, I'd sit down again at my desk and it would fall together right away.
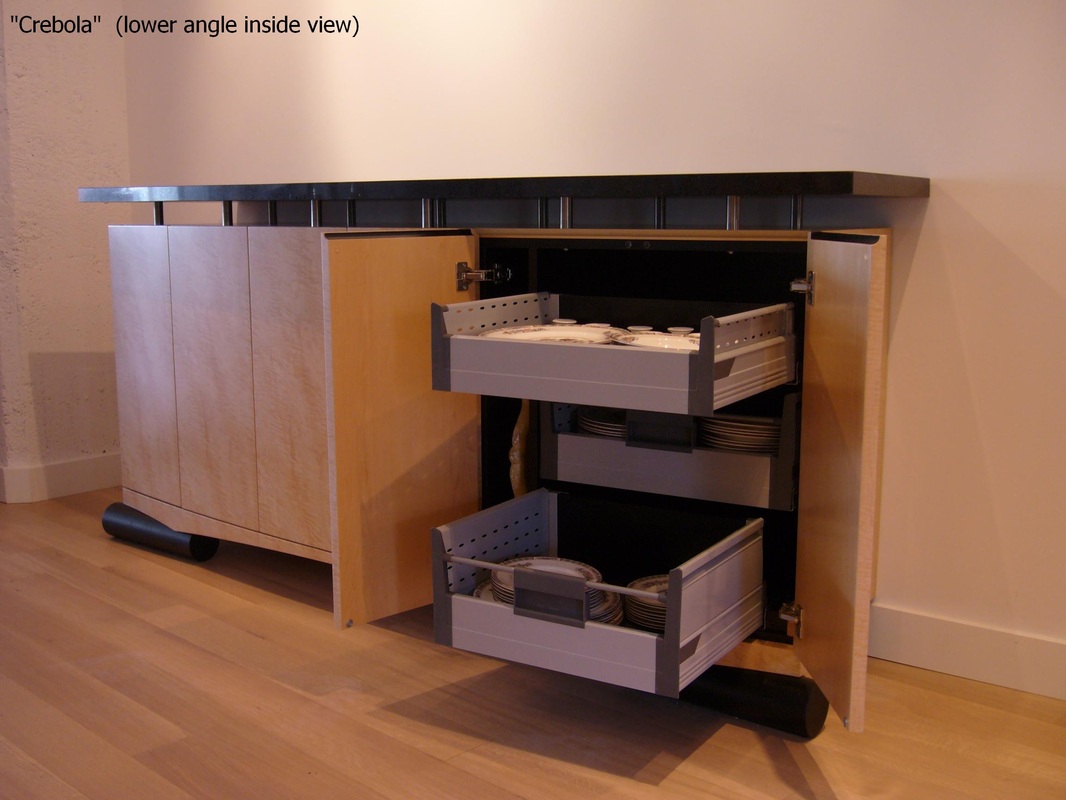
I spent a lot of time trying to figure out how I was going to design the back foot. I knew that the side-bottom profile was going to sweep back and up to the wall as if there was some kind of energy transition between the piece and the wall, but this last supporting detail nagged at me for a spell. Finally, as I was sitting staring at the model with a handful of possible back legs in one hand, I used the other hand to flick away the model's present back foot to leave a void... that's it! "Just make it be what you are intending it to look like Jim!" ...The actual physical support hidden beneath is much more than air obviously.
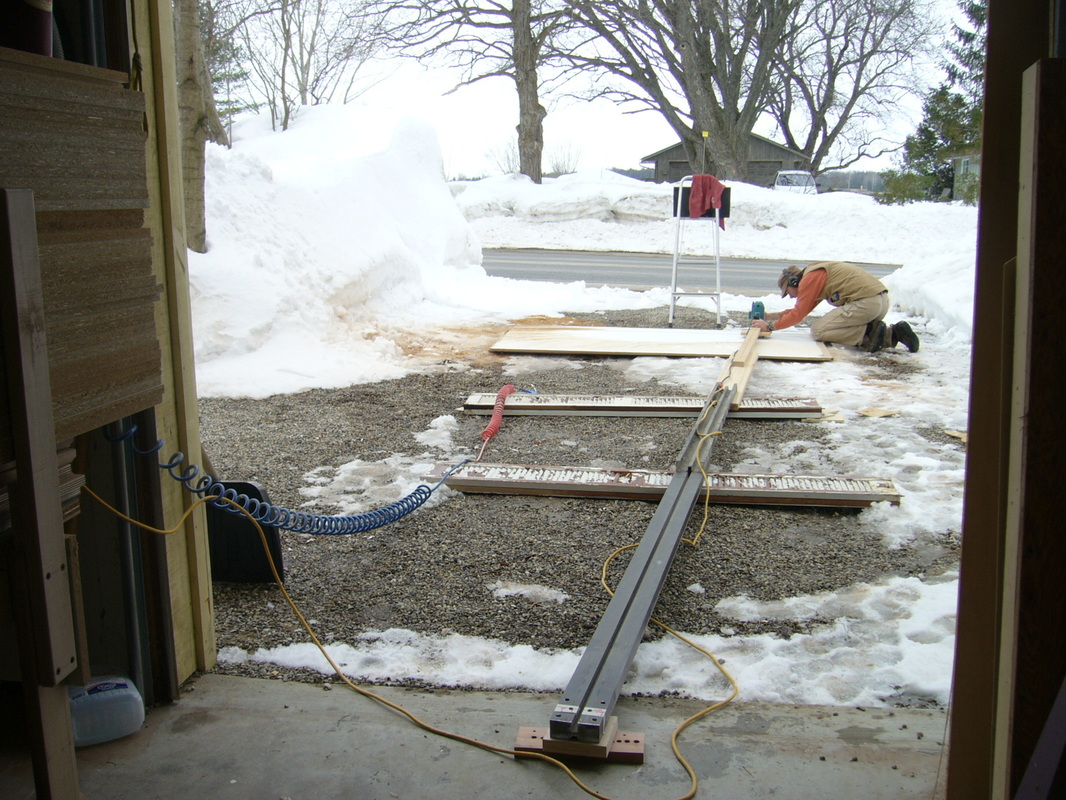
I could've iused a template of a curve that I had from a previous project, but over 90", it was too curved for this piece, too "loud", so I made a long extension out on the driveway and cut a new radius that over the length of the piece would be just noticeable and very powerful in its subtleness.
The curly maple veneer I had on hand definitely had the figure I wanted, but over time it had become quite buckled and required the lengthy process of soaking it and pressing it between panels with absorbent paper sheets. I would need to change the paper each day for 6 days until it was flat enough to work with. It was worth the work for this piece.
Once again, I made a custom mold to bend the door panels, which all went into my vacuum press to create the accurate curves.
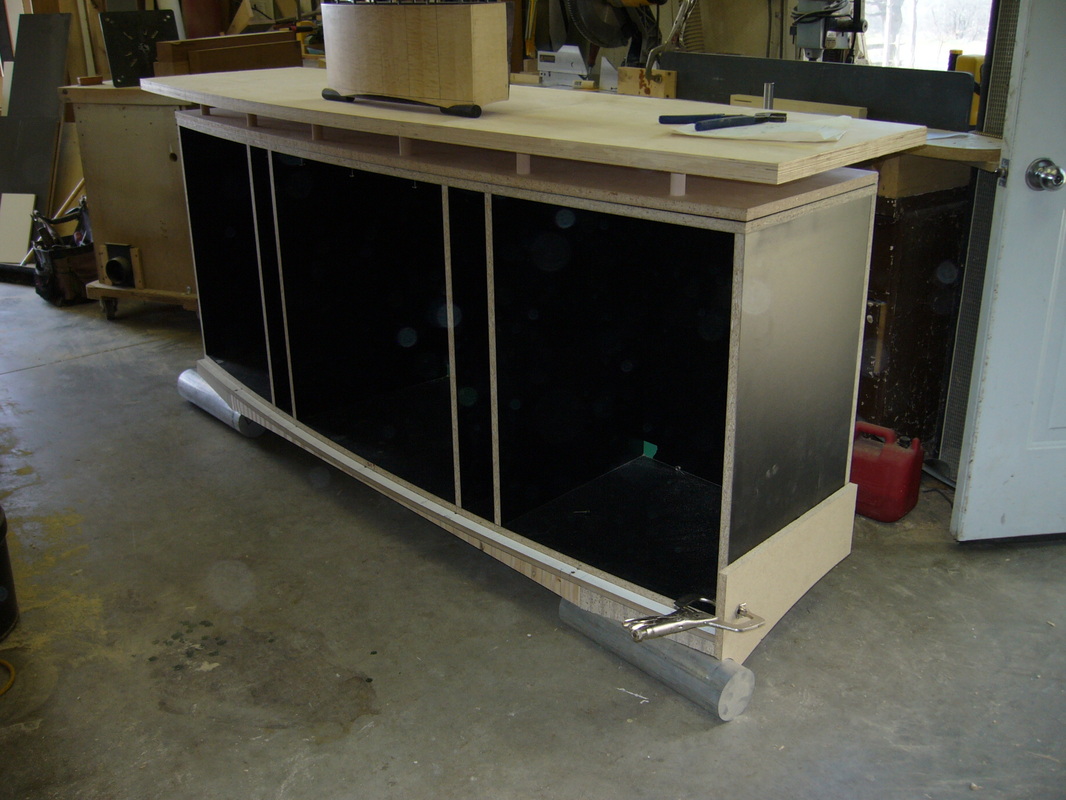
To make the 4" solid aluminum feet fit into the base, I needed to make an accurate saddle on each end. This is where I pulled out my recently acquired knowledge of mold making (See "The Grind" ). The 25lb(ea) aluminum cylinders were eventually taken to a place in Toronto to be anodized black. Really nice finish; satin black.
There's a very satisfying finger pull running along the top edge of the doors, with another curved space scooped into the mating cabinet's top edge.
Without the curly maple doors, skirt and side panels, the inner construction didn't look that flashy, just a lot of carefully cut angles and curves. Usually I would like to have the customer not see the piece on site until it is fully assembled, so that the final presentation isn't lessened by witnessing the gradual assembly. In this case though, Bob assured me that as he's seen the construction methods behind set designs, seeing the guts of this piece during installation would not take away from the final 3D puzzle that would be the long awaited... Crebola!
The granite composite top was bolted in place, dusted clean and there it was. Ba-Bam!
They had it loaded up with fine china, serving trays and a good selection of entertainment supplies before I had packed up my tools to leave. This was the first of 5 pieces I've done for them so far.
A project like this is what propels me and takes my skill set of designing and making to a higher level each time. This is my game. Bring it on. Please and Thank You.
This one's really special.
It had been a little while since someone had put me in a position to come up with a larger unique and original piece in my own style. I was basically told that they wanted something to put their dishes and bar in and "there's the wall where it'll go". Bob is amazing in inspiring people to do their best; he had pulled it out of people many times back in the day when he was a movie producer among other things, and so when he saw my abilities and gave me an idea of which of my pieces he liked ("Liquor Cabinet 2"), he easily set me on course.
I spent a week getting not much done other than brain storming, sketching, resketching and intensive model making. My office space is upstairs in my studio, adjacent to my concise music area. During the creative process of designing this piece, I would stare at pages of doodles and scribbles for a while at my desk, then walk over to my music pit to bash away on a guitar or go for a run on my drum kit for a break. By the time I was relieved, I'd sit down again at my desk and it would fall together right away.
I spent a lot of time trying to figure out how I was going to design the back foot. I knew that the side-bottom profile was going to sweep back and up to the wall as if there was some kind of energy transition between the piece and the wall, but this last supporting detail nagged at me for a spell. Finally, as I was sitting staring at the model with a handful of possible back legs in one hand, I used the other hand to flick away the model's present back foot to leave a void... that's it! "Just make it be what you are intending it to look like Jim!" ...The actual physical support hidden beneath is much more than air obviously.
I could've iused a template of a curve that I had from a previous project, but over 90", it was too curved for this piece, too "loud", so I made a long extension out on the driveway and cut a new radius that over the length of the piece would be just noticeable and very powerful in its subtleness.
The curly maple veneer I had on hand definitely had the figure I wanted, but over time it had become quite buckled and required the lengthy process of soaking it and pressing it between panels with absorbent paper sheets. I would need to change the paper each day for 6 days until it was flat enough to work with. It was worth the work for this piece.
Once again, I made a custom mold to bend the door panels, which all went into my vacuum press to create the accurate curves.
To make the 4" solid aluminum feet fit into the base, I needed to make an accurate saddle on each end. This is where I pulled out my recently acquired knowledge of mold making (See "The Grind" ). The 25lb(ea) aluminum cylinders were eventually taken to a place in Toronto to be anodized black. Really nice finish; satin black.
There's a very satisfying finger pull running along the top edge of the doors, with another curved space scooped into the mating cabinet's top edge.
Without the curly maple doors, skirt and side panels, the inner construction didn't look that flashy, just a lot of carefully cut angles and curves. Usually I would like to have the customer not see the piece on site until it is fully assembled, so that the final presentation isn't lessened by witnessing the gradual assembly. In this case though, Bob assured me that as he's seen the construction methods behind set designs, seeing the guts of this piece during installation would not take away from the final 3D puzzle that would be the long awaited... Crebola!
The granite composite top was bolted in place, dusted clean and there it was. Ba-Bam!
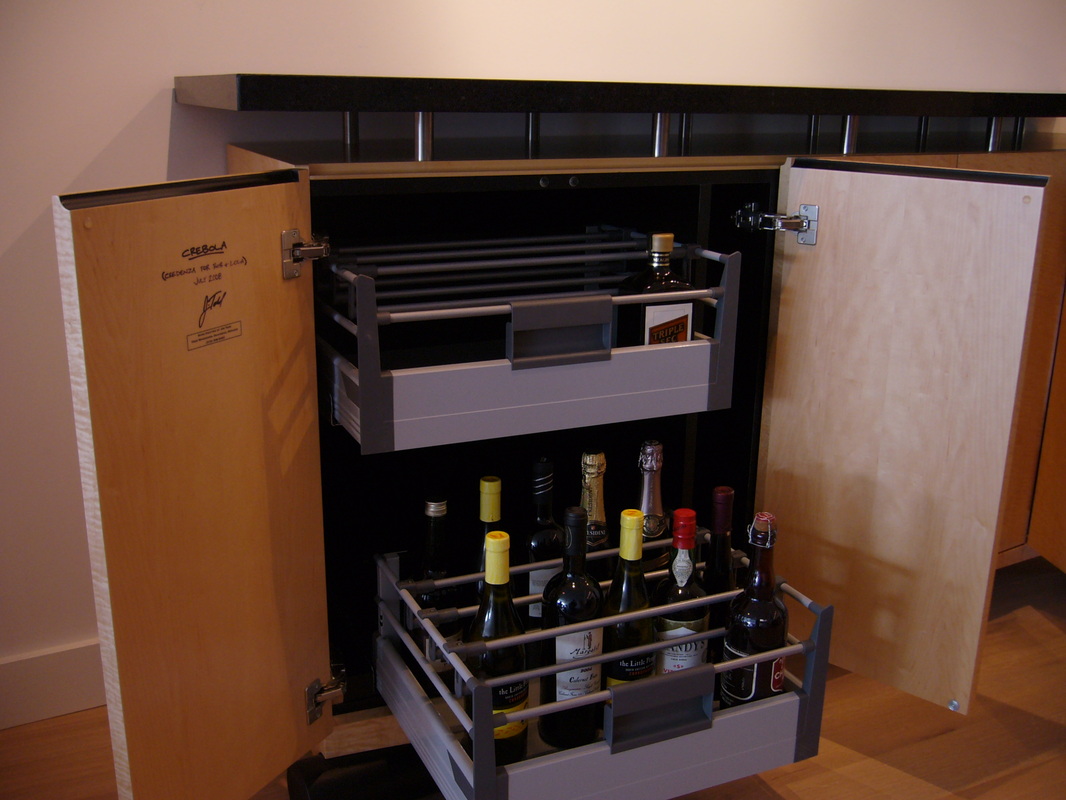
They had it loaded up with fine china, serving trays and a good selection of entertainment supplies before I had packed up my tools to leave. This was the first of 5 pieces I've done for them so far.
A project like this is what propels me and takes my skill set of designing and making to a higher level each time. This is my game. Bring it on. Please and Thank You.
